
Getting Started
1. Create a Cloudflare API Token
The Cloudflare Dashboard screenshots in this guide use the Chinese interface. The English labels for every required control are included below, so you can complete the process without relying on the screenshots.
1.1 Use the Workers Edit Template
- Open Cloudflare's API Tokens page.
- Click
Create Token. - Find the
Edit Cloudflare Workerstemplate. In the Chinese interface, it is labeled “编辑 Cloudflare Workers.” - Click
Use templateon that template.
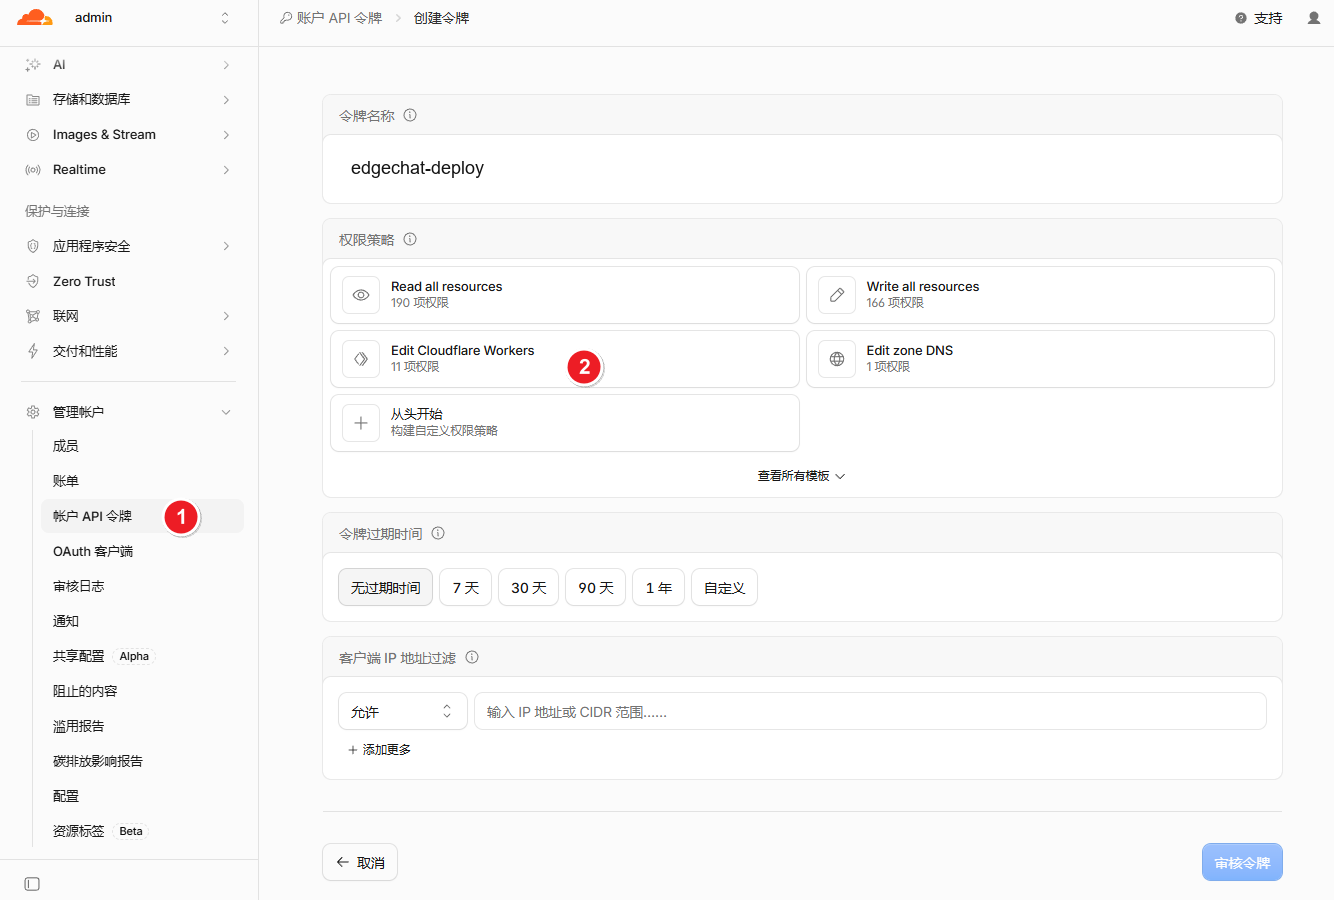
This template adds the basic permissions required to deploy a Worker. Do not select a read-only template, because GitHub Actions must be able to create and update the Worker.
1.2 Verify and Complete the Edit Permissions
Cloudflare may change the permissions included in a template as the dashboard evolves. Do not copy the number of rows from a screenshot. Check the final permission summary and make sure the same Token contains all four permissions below:
| Service | Access level |
|---|---|
| Workers Scripts | Edit |
D1 | Edit |
| Workers KV Storage | Edit |
R2 | Edit |
Check which permissions the Edit Cloudflare Workers template already includes, then click Add more to add any missing D1, Workers KV Storage, or R2 permissions. If a future version of the template already includes one of them, do not add a duplicate row.
The current GitHub Actions CI configuration does not define Workers Routes, so it does not require Workers Routes Write. The cleanup Cron Trigger is deployed with the Worker script, and Cloudflare does not expose a separate API Token permission named Cron Triggers. Add zone-level Workers Routes Write only if you customize the CI configuration with domain routes.
Important
Create only one API Token. Completing the permissions means adding rows to the current Token, not creating another Token.
Under Account Resources, select:
IncludeSpecific account- The Cloudflare account where EdgeChat will be deployed
You can leave client IP filtering and token expiration at their default values when those options are shown. Review the permissions, click Continue to summary, and then click Create Token.
1.3 Copy and Store the API Token
Cloudflare displays the complete new Token only once. Copy it immediately and store it as this GitHub Repository Secret:
CLOUDFLARE_API_TOKEN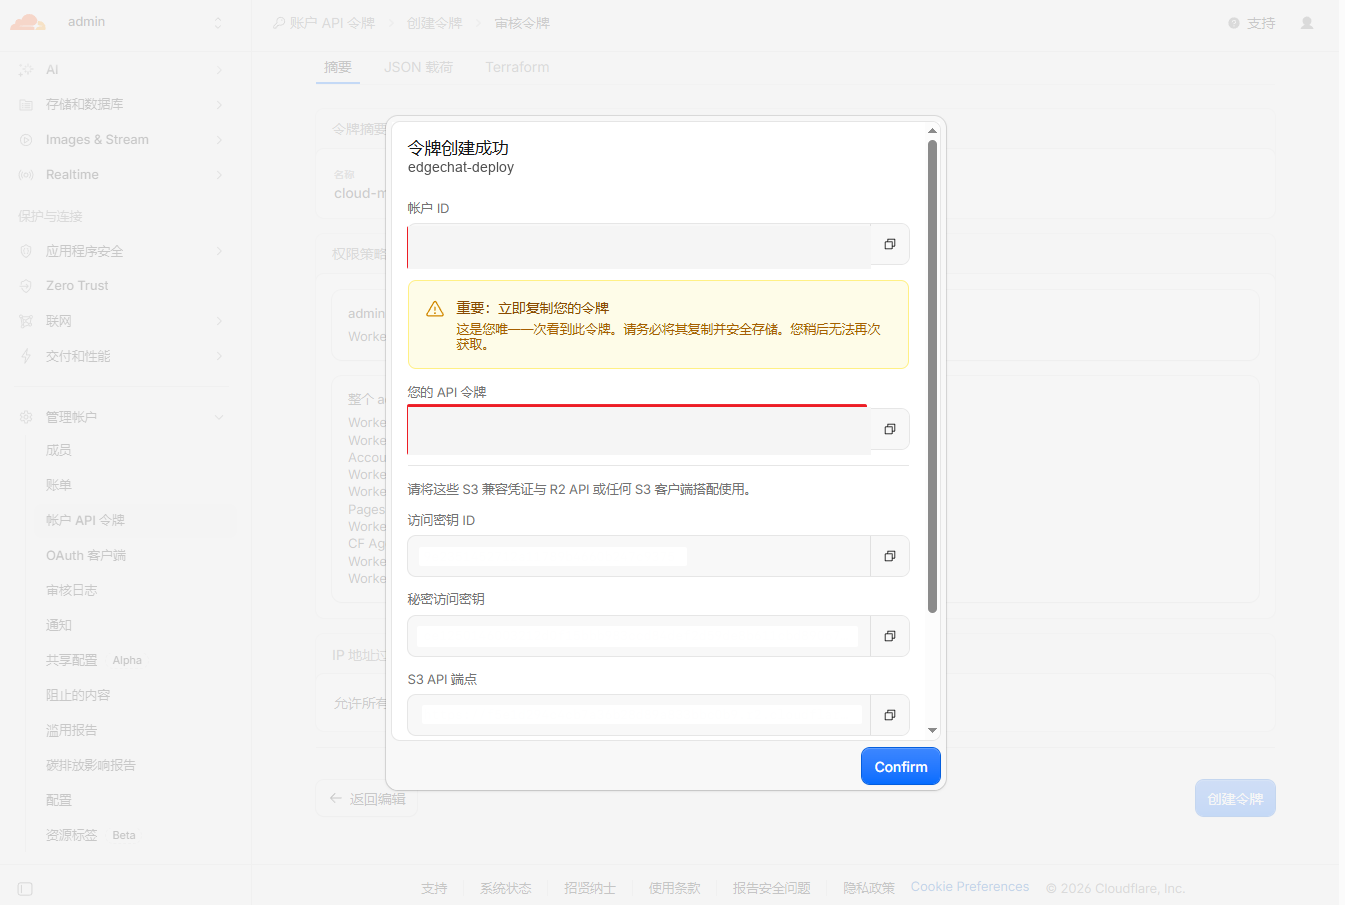
The account ID and Token in this screenshot are redacted. EdgeChat only needs CLOUDFLARE_API_TOKEN; it does not use the S3 access credentials shown lower in the result dialog.
Do not include quotes, leading or trailing spaces, or line breaks. If the Token is lost, Cloudflare cannot display the original value again; you must create a replacement.
1.4 Copy the Account ID
Open the Cloudflare account where EdgeChat will be deployed. Find Account ID on the account home page or the Workers & Pages overview, then copy it.
An Account ID is normally a 32-character hexadecimal string containing only the digits 0-9 and letters a-f. Its format looks like this:
0123456789abcdef0123456789abcdefThe current dashboard normally shows the Account ID in the Token result dialog as well. If it is absent, copy it from the account home page or the Workers & Pages overview.
Store this value as the following GitHub Repository Secret:
CLOUDFLARE_ACCOUNT_IDDo not confuse the Account ID with a domain's Zone ID. The deployment workflow requires the account-level Account ID.
2. Prepare the Repository
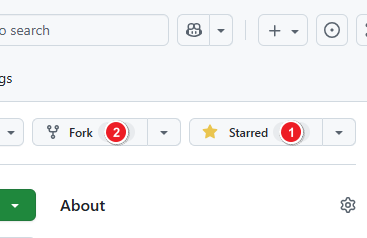
Fork or clone this repository to your GitHub account:
3. Configure the Required Values
Open Settings -> Secrets and variables -> Actions, select Secrets, and click New repository secret:
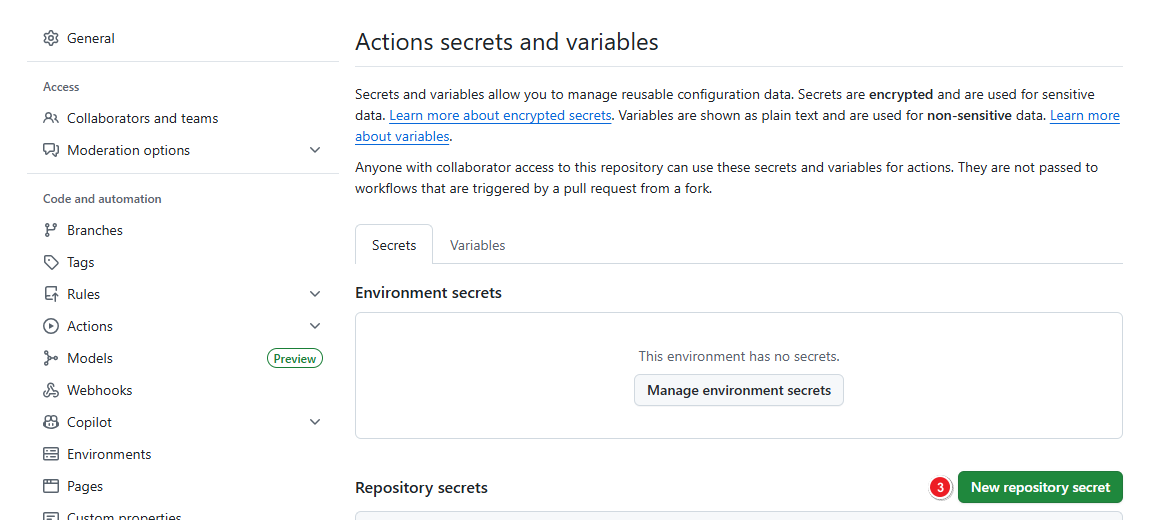
These four values are required for automatic deployment. Add all of them as Repository secrets:
| Setting | Purpose | Required |
|---|---|---|
CLOUDFLARE_API_TOKEN | Lets GitHub Actions call the Cloudflare API to inspect resources and deploy the application. | Yes |
CLOUDFLARE_ACCOUNT_ID | Selects the Cloudflare account used for deployment. | Yes |
CFCHAT_ADMIN_USERNAME | Sets the administrator username created during the first deployment. | Yes |
CFCHAT_ADMIN_PASSWORD | Sets the administrator password created during the first deployment. | Yes |
4. Start Automatic Deployment
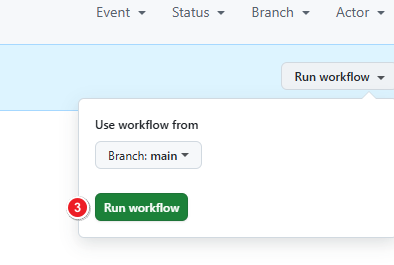
- Open the repository's
Actionspage and selectDeploy Worker. - Click
Run workflow. - Select the
mainormasterbranch and confirm the run. - Future pushes to
mainormasteralso trigger deployments automatically.
5. What the Workflow Does
- Installs dependencies
- Builds the frontend
- Checks or creates Cloudflare resources
- Initializes the D1 database
- Creates the administrator account
- Generates and injects server-side encryption keys on the first deployment while preserving them on later deployments
- Deploys the Worker
6. Post-deployment Checks
- Open the home page and confirm that the site is reachable.
- Sign in with the administrator account.
- Check that chat and administration pages work correctly.
- If R2 is enabled on the account, verify file uploads.
- Confirm that the admin panel does not expose message content.
- To connect Telegram, open "Telegram Bridge," connect the Bot, and map a public or private group listed in the admin panel.
- Open "Site Settings" and confirm that version update status is displayed correctly.
If R2 has not been enabled for the Cloudflare account, Actions will still complete the deployment but will not create the FILES binding. Text chat will work, while attachment uploads will report that the current deployment has no R2 binding. Attachment downloads and Telegram file synchronization will also be unavailable. Enable R2 and rerun the deployment to restore these features automatically; no manual Worker configuration is required.
The update status is calculated directly in the administrator's browser by comparing the deployed commit with the public GitHub repository. It does not require a scheduled job or another Secret. For manual deployments, build from a clean Git commit that has already been pushed so the admin panel can identify the deployed version accurately.
Administrators enter the Telegram Bot Token in the admin panel. The Worker encrypts it with the existing server-side keyring before saving it to D1, so no plaintext configuration or GitHub Secret is needed. See Telegram Bridge for detailed instructions.
For a complete explanation of the deployment flow, continue with GitHub Actions Deployment.